If you want to learn how to read a tape measure, you’re in the right place. Even if you’re not a DIY enthusiast, knowing how to read a tape measure is a useful skill. At some point in your life, you’ll likely need to measure something, whether it’s a piece of furniture, curtains, or something else. Reading a tape measure is straightforward once you understand it, but it’s one of those skills that you might not know if no one has ever shown you.
There are many tape measures available on the market, ranging from cheap $4 tapes to more expensive $50+ options. My personal favorite is the Stanley FatMax. This tape measure costs about $25, but it’s worth every penny.
What I appreciate most about the Stanley FatMax is that it’s easy to read, the tape is wide, and it has a long standout length. “Standout” refers to how far you can extend the tape before it bends. You might be wondering why I didn’t take a picture of my Stanley tape. Well, my Stanley tape measure is in the garage, and it’s about 10°F outside. So, instead of braving the cold, I’m using the one located in my warm basement.
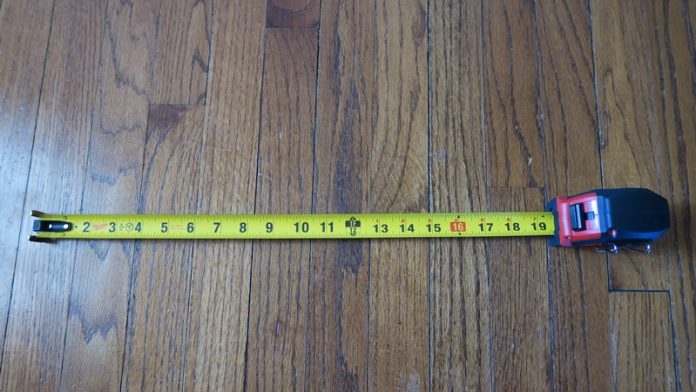
Tape measures come in all different sizes. The most common and the one I would recommend is a 25′ tape measure.
How to Read A Tape Measure
Upon first glance, you might find the numbers on a tape measure overwhelming and wonder about their significance. The most noticeable numbers are the large ones, which represent inches, and they are typically in black.
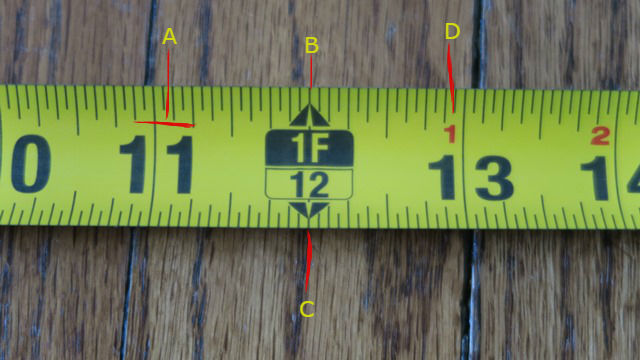
A – So you can see by the picture it shows 11″, 12″ 13″ inches, which you can see with the letter “A”.
B & C – In between the 11″ and the 13″, you will see the number “1”, which represents feet. So in this picture, you can see it shows 1 foot. Underneath the 1F is the number 12, well this just shows 12″. You may be wondering why you need both. It’s really designed for two types of people. Some people like to express their measurement in feet, while other just want to express the measurement in inches.
D – With the red numbers, this is associated with the Foot measurement and makes life a little easier. If I take a measurement, I can either know right away the measurement is either 13″ of 1’1″. This way you don’t have to stop and work with subtraction. Just makes your measurements quicker and easier.
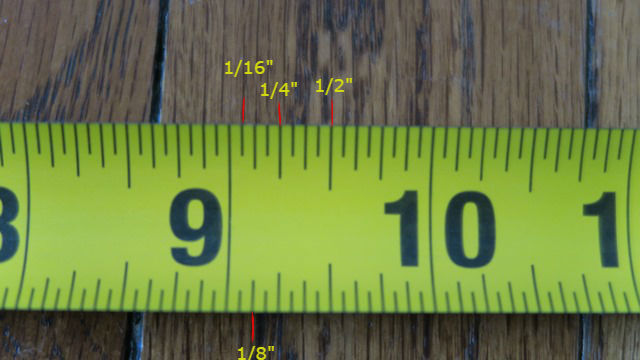
In between the inches, you’ll notice a series of lines at both the top and bottom of the tape measure. The good news is that both the top and bottom lines serve the same purpose. If you focus your attention between the numbers 9 and 10, you’ll see these lines. There are 15 lines between 9 and 10.
You’ll also observe that these lines come in different sizes, and there are four different sizes for a reason. The largest line, located in the middle between the 9 and 10, represents 1/2 inch. So, if your measurement aligns with this line, your measurement is 9-1/2 inches. The next shorter line denotes 1/4 inch measurements. The line smaller than that represents 1/8 inch, and the smallest line indicates 1/16 inch. These varying line sizes are designed to help you easily and accurately determine measurements. For example, if you’re measuring something that falls between the 9 and 10-inch marks and lines up with the fifth bar, you can quickly deduce that your measurement is 9 feet and 5/16 inch, as you’re using the 1/16-inch reading due to the shortest bar.
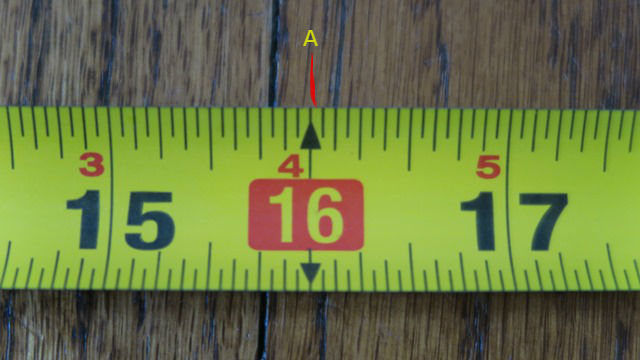
The last feature on a tape measure to take note of is the markings at 16 inches, 32 inches, and every 16 inches thereafter. These markings are particularly handy for framers. If you’re framing a room and need to identify the locations of the studs, you can quickly and easily make your marks. In framing, studs are typically spaced 16 inches apart from one another.
I hope I’ve explained this clearly and in a way that’s easy to understand. Once you become familiar with a tape measure and how it functions, reading measurements will become second nature. I trust that this article has been helpful and has provided you with a good understanding of how to read a tape measure.